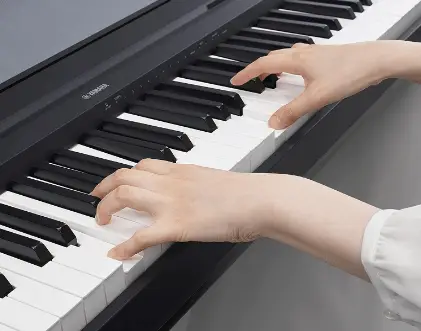
Yamaha’s keyboards are high quality devices used by many music producers and artists around the world.
They are also used in professional recording studios for live performances.
And in this tutorial, I show you how to connect a Yamaha keyboard to FL Studio.
I will show you step by step the whole process of how to connect the Yamaha keyboard to the computer and give you advanced tips from my experience as a producer to make music with the best audio quality.
So stay tuned!
Yamaha P45 88-Key Weighted Digital Piano
- Includes the P45 Digital Piano, power adapter, sustain pedal and music rest
- 88 fully weighted piano style keys simulate the feel of an acoustic piano and provide a quality playing experience
- GHS weighted action is heavier in the low end and lighter in the high end, just like an acoustic piano
- Contains 10 different voices, including digitally sampled tones from real Yamaha acoustic grand pianos
- Dual mode lets you combine 2 voices together, like piano and strings, for an inspiring new playing experience. Tuning- 414.8 – 440.0 – 446.8 Hz
Table of Contents
- How To Set Up & Connect a Yamaha Keyboard To The Pc With FL Studio
- Video Tutorials On How To Connect Yamaha Keyboard To Computer
- Final Thoughts & Extra Tips
- Sources
How To Set Up & Connect a Yamaha Keyboard To The Pc With FL Studio
FL Studio is a powerful audio recording and editing tool for musicians and producers.
It has many features that allow users to record, edit, mix, and master tracks.
The program also includes a wide range of instruments and sound effects.
This is an amazing music production software that allows you to create songs from scratch.
Best of all, it can also be used in combination with external controllers.
Yamaha’s keyboards are one of the most popular MIDI controllers on the market today.
They have many different models that come with different features. These devices are great for music production on computers.
But what if you want to use them in FL Studio?
Read this full article to find out how.
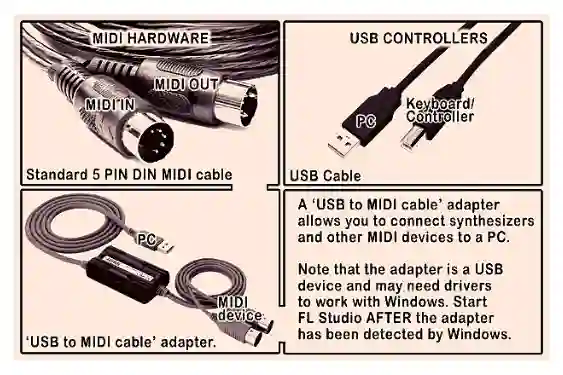
Step 1. Select the right MIDI Cable
You can use almost any type of keyboard with FL Studio 20. However, some controllers come with MIDI ports, which can be a drawback.
There are 2 kinds of MIDI controllers:
- Modern Keyboard: (uses USB cable)
- Generic Keyboard: (requires a 5-pin MIDI cable).
Try to choose a cable compatible with your keyboard. In case you don’t have a USB cable, you can buy a MIDI adapter.
For this reason, there are two ways to set up MIDI connections.
One method is to use a MIDI interface such as the Roland V-Synth.
And the other option is to use a USB MIDI device.
Step 2. Install The Yamaha Keyboard Driver
If you own a Yamaha keyboard, then you need to install its driver first before connecting it to FL Studio.
You can download the latest version of the MIDI Controller drivers from Yamaha’s official site.
Once you have downloaded the drivers to your PC, go to the folder called “Downloads” and find the installer.
Open the folder and double-click on the Yamaha installation file and follow the instructions
This will start the installation process. Follow the steps carefully.
Step 3. Connect The Yamaha Keyboard to The Computer
Once the drivers have been installed, you will need to connect the cable to your Yamaha keyboard and your PC
Important: Remember to turn on your MIDI Controller.
Put the cable into the MIDI port on your sound card or if you don’t have one use one of the USB ports on your computer. Wait a moment for it to be detected.
Then restart your PC for all changes to take effect.
Next, go to the device manager in the taskbar.
There, you will see an icon called “Connected USB Devices” in the lower right corner of the screen.
Yamaha P45 88-Key Weighted Digital Piano
- Includes the P45 Digital Piano, power adapter, sustain pedal and music rest
- 88 fully weighted piano style keys simulate the feel of an acoustic piano and provide a quality playing experience
- GHS weighted action is heavier in the low end and lighter in the high end, just like an acoustic piano
- Contains 10 different voices, including digitally sampled tones from real Yamaha acoustic grand pianos
- Dual mode lets you combine 2 voices together, like piano and strings, for an inspiring new playing experience. Tuning- 414.8 – 440.0 – 446.8 Hz
Click on it and a list of devices connected to the computer should appear.
Make sure that the device labeled “Yamaha” is being recognized by the PC’s operating system.
It should say something like “Yamaha USB MIDI Controller”.
Step 4. Start FL Studio
Once you open FL Studio, you have to go to the general settings, where you will see the MIDI box and from there you can select the input and output sources.
There are two ways to get there. One is by using the keyboard shortcut F10.
The other option is to go to the main menu bar and select “Options > General settings”.
From the MIDI tab, you can select the device you want to use.
Once you have set everything up correctly, it will start the connection process between the Digital Audio Workstation and you are ready to start recording.
Please note:
A common mistake that could cause that your Yamaha device does not work properly, is not assigning the correct ports to it in the DAW.
So, to start recording audio, you must first choose the right ports.
I will explain how to do this below.
Step 5. Set up MIDI In/Out
In the tab called MIDI, you have to make certain settings so that all the functionalities of your Yamaha keyboard can be recognized by Fruity Loops.
Please note that if the name of your device is not listed in FL Studio 20, then you must use the generic settings for external keyboards
1. Enable the external Yamaha controller
Move to the bottom of the MIDI window and click on the ”Control Type” option and pick the name of your synthesizer, in this case Yamaha, from the list of devices.

Then click on the ”Enable” button to activate it, and then assign it a port number if it doesn’t have one.
When the icon turns green, it means that the external controller is enabled.
2. MIDI Output
We will continue the configuration in the top box of that window, which corresponds to the ”Outputs”.
First look at the list of devices and select the one that matches the name of your keyboard.
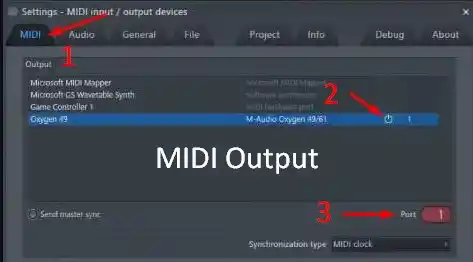
Then set a port number to your device and make sure it coincides with the previously configured MIDI keyboard port.
The power light should be green on the icon.
Note: Use the ”Send master sync” option only if your Yamaha equipment is equipped with an internal sequencer.
3. MIDI Input
This step is easier, since we’ve already done most of the work.
Here, you just have to pick the name of your Yamaha external controller and make sure it is turned on (the icon is green).

Step 6. Syncing The Keys
By now, your Yamaha keyboard has to be recognized by the DAW and should work without problems.
Now, when you play any song on the keyboard, it will appear on the audio track.
You can also use the MIDI controller to control volume, panning and other parameters.
However, if you want to use its extra functions or customize the buttons and keys, then you should know the advanced settings of Fruity Loops.
If you want to learn how to use a MIDI keyboard in FL Studio 20 (or lower versions), check out my tutorial, where I explain everything in more detail.
In addition, you will learn how to map, assign sounds or pads and record from your Yamaha controller to FL Studio, among other things.
Video Tutorials On How To Connect Yamaha Keyboard To Computer
In addition, if you follow all the steps in these video tutorials.
You will be able to control your favorite music production software with a Yamaha keyboard by connecting it to your computer.
Tutorial #1
Tutorial #2
Final Thoughts & Extra Tips
FL Studio is an amazing DAW software that allows you to create music using various instruments.
It has many features that allow you to produce high quality tracks.
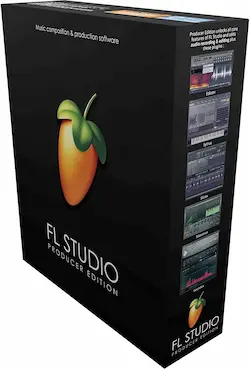
Description:
Get the Best Value for Money version of FL Studio 🏆
On the other hand, Yamaha’s keyboards are great tools for musicians who want to create music.
Bonus Tips:
- Please make sure to use the appropriate connector cable for your MIDI keyboard.
- Avoid using MIDI adapters whenever possible, as they are associated with loss of sound quality.
- If your Yamaha synthesizer does not work, does not sound, or is not recognized when connected to FL Studio 20, you can fix it by:
- Updating its original drivers
- Choosing the appropriate MIDI port
- Or selecting the generic MIDI keyboard feature in the FL Studio settings.
- Keep in mind to enable the MIDI synthesizer in the advanced options of Fruity Loops, so you can use it.
- Remember to always use the official drivers. Do not use generic software.

